
Halloween is literally just around the corner and that could mean one of two things: Either you already have your costume or you don't! With the spooky holiday 10 days away, we've got an awesome DIY idea that is not only easy, but also very popular on Halloween.
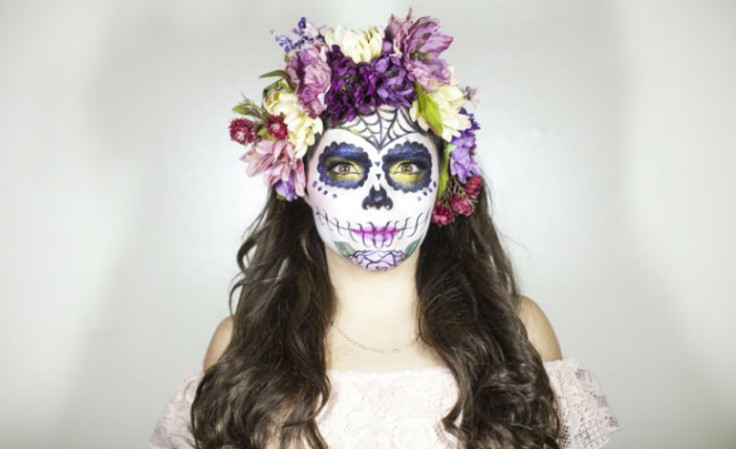
Thanks to NBC Universo host, Yarel Ramos, we found an easy way to get the coolest "Dia de los Muertos" look ---you know, the calaverita with bright colors and lots of flowers look. The best part about this "Day of the Dead" look, is that you can rock it two times in a row. On Halloween night and on actual "Dia de los Muertos" on November 1st.
“In my very traditional Mexican household, El Dia de los Muertos was a day that we celebrated with much anticipation,” says Yarel. “There’s the altar, the sugar skulls and the lights, but it’s also a special day to remember and celebrate loved ones who are no longer with us. One of the traditional customs I have always liked to incorporate is Catrina makeup—my cousins and I would do each other’s makeup, dress up, put flowers in our hair…it’s still one of my favorite ways to celebrate.”
Check out 10 easy steps below. They are so easy, you can nail the look in less than 15 minutes!
STEP 1: Start with clean skin. After using your usual daily cleanser (we love La Roche-Posay’s Foaming Gel Cleanser), prep with Pixi Glow Tonic and then apply Vichy Aqualia Thermal Rich Cream.
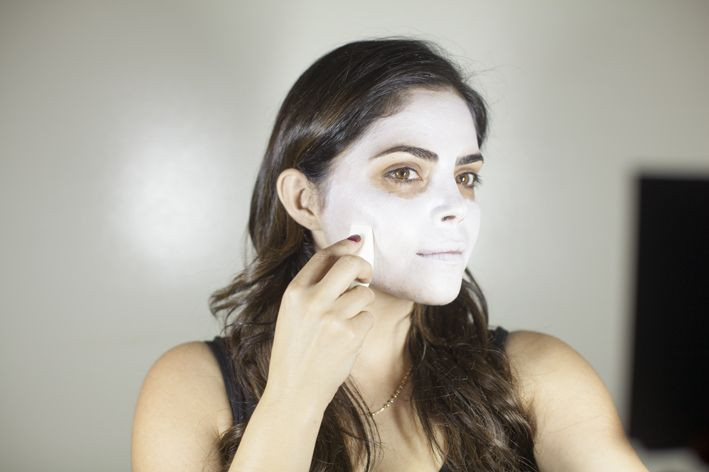
STEP 2: Use the Wet-n-Wild Fantasy Makers Kit to apply multiple layers of white face makeup, leaving the eye area bare.
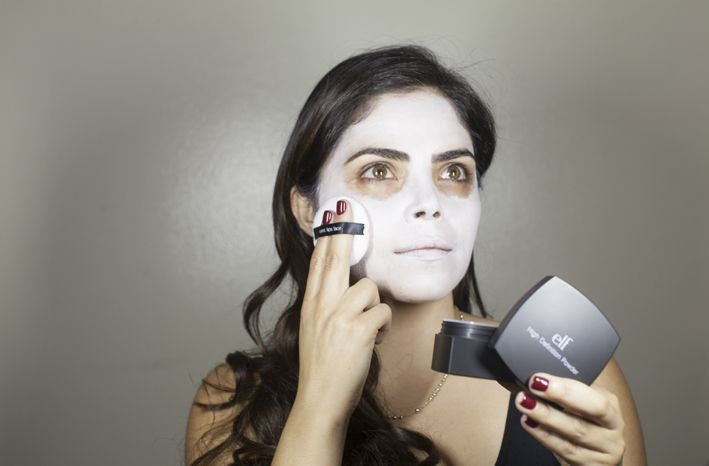
STEP 3: Set white makeup with e.l.f. High Definition Powder with a powder puff to avoid smudging.
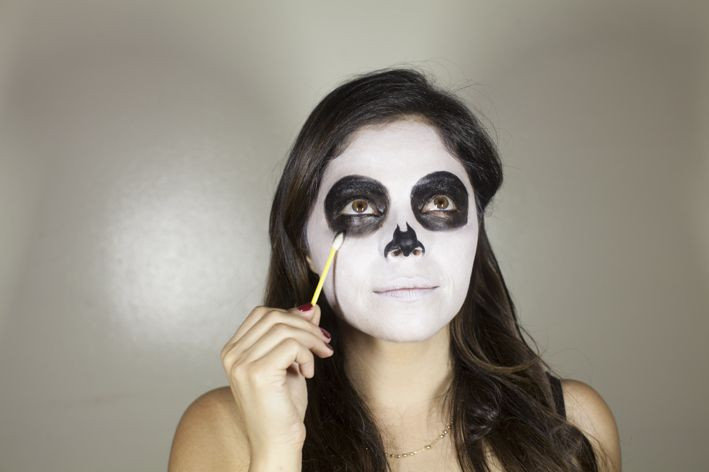
STEP 4: Use the black pencil from the Wet-n-Wild Fantasy Makers Kit to draw a circle around each eye and to outline the nose with a triangular shape. Sharpen and darken these shapes with Pixi Lash Line Ink in Black Silk. Fill in these areas with the black grease paint, also in kit.
STEP 5: Add depth by using the Pixi Cheek Brush to apply Revlon Powder Blush in Oh Baby to cheekbones, temples, forehead and chin.

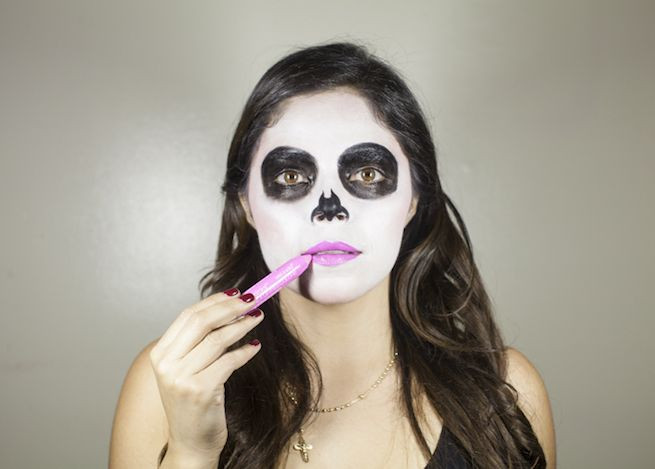
STEP 6: Apply Sonia Kashuk Lip & Cheek Tint in Charmed directly to the lips.
STEP 7: Add scalloped edges to the circles around your eyes with the black pencil from the Fantasy Makers Kit. Dust scallops with the Sonia Kashuk Eye Shadow in Prima Ballerina.
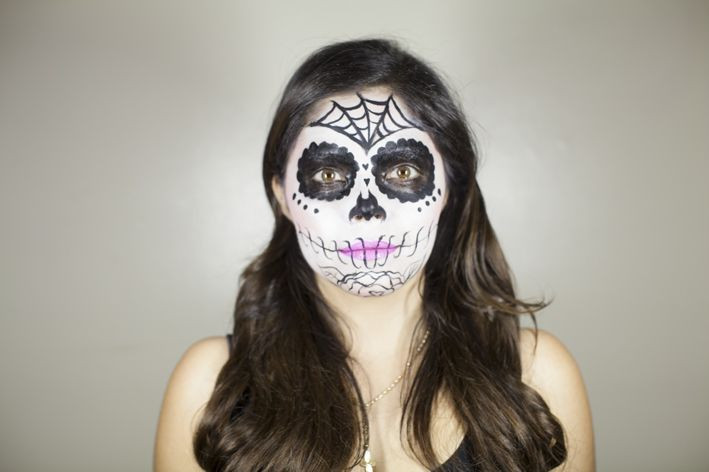
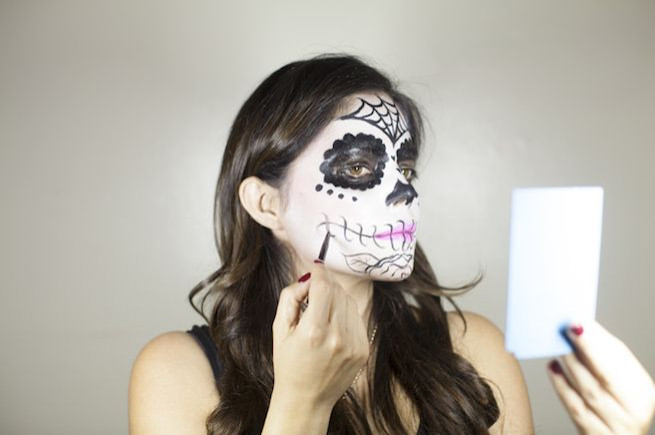
STEP 8: Using the Pixi Lash Line Ink in Black Silk, free-draw details of your choosing, such as teeth, a spider web and a rose.
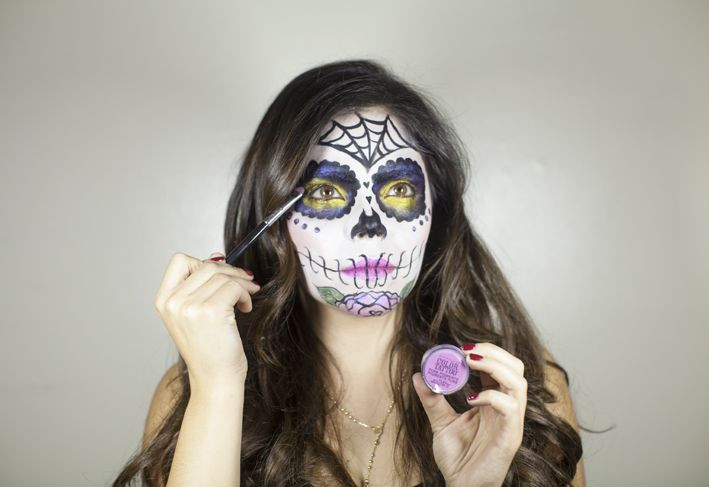
STEP 9: Add Sonia Kashuk Eye Shadow in Prima Ballerina to the eyelids with the flat brush from the Sonia Kashuk Essential Eye Kit. Use the crease brush from the Sonia Kashuk Essential Eye Kit to layer on the Sonia Kashuk Eye Shadow in Show Stopper Gold, blending outward towards eyebrows.
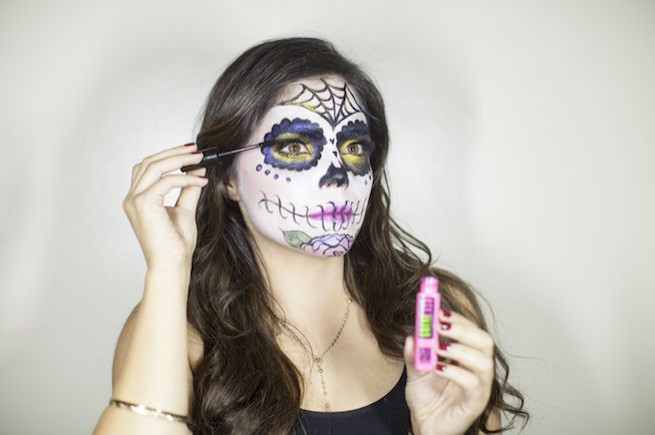
STEP 10: Finish the look by applying two coats of Maybelline Great Lash Mascara in Blackest Black. (Optional: Add Sonia Kashuk false lashes for a more dramatic look.)
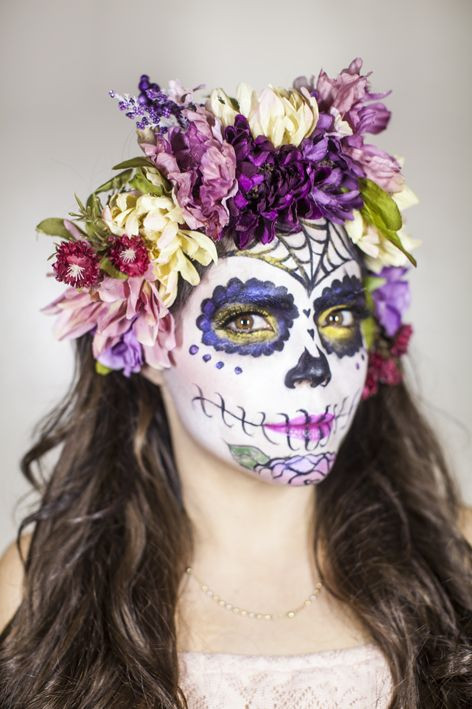
FINAL LOOK ---VOILA!


© 2025 Latin Times. All rights reserved. Do not reproduce without permission.


